Thứ Bảy, 28 tháng 6, 2014

How to Change the Folder Icon?

0 nhận xét


Use Custom Icon in Folder


By default, Windows folders look like a yellow folder. And if you use any custom theme, it may change. Many of you might know how to customize the Windows Folder Icon. It's very easy to change. Previously I discussed about how to change the pen drive/ hard drives icon. Today I'm gonna discuss about changing the folder icon. 


It's been few months when I published any Windows trick. Sorry for the long break!


To change the folder icon is much easier than changing the drive icon. If you wanna change the drive icon, you have to use an autorun file. But you don't need any notepad file to change the folder icon. All you need is just an icon format (must be .ico) image. 


First collect an icon format image. You can convert an image into icon in any of the following ways:

I prefer using IcoFx. Download it and convert your image into icon within seconds. After getting the icon, you can go for the next step.


Change Folder Icon
  1. Copy the icon that you wanna show in the folder. 
  2. Go to My Computer (Start + E) or any location where your desired folder is located. 
  3. Paste the icon within that folder.
  4. Press Backspace to get out of this folder. Now click right mouse button over the folder and go to the Customize tab > Change Icon as shown in the image below. 

Customize the Windows Folder


After hitting the Change icon button, you will get a list of Windows Icons. You can use any of them. But here I'm gonna use the custom icon. So you have to click on the browse button. 


Windows Default Icons

After hitting the browse button, you have to locate the folder again. Go to the folder and choose your custom icon that you've copied in the first step. Now hit on Open > Apply > OK. And you're done! 

Restart your PC if you don't see any change. 


Note: It's not necessary that the icon needs to be copied in your desired folder. Windows can show the folder icon from any other folder. But when you take that folder through a CD or Pen Drive, you may not get that icon with the folder. That's why I'm recommending to keep the custom icon within this folder. 


For more tips on Windows, visit this page . . .


Stay with Marks PC Solution to get more interesting IT topics!


Thứ Sáu, 9 tháng 5, 2014

How to Create Bootable Windows Disk?

0 nhận xét


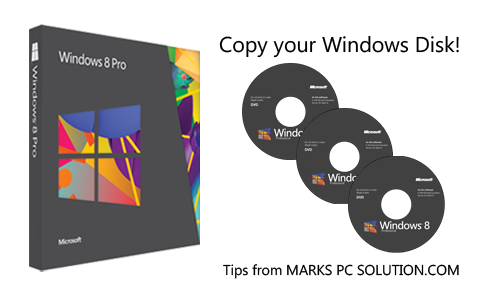
Copy Windows Disk


Hello Windows lovers? How are you? Today I am gonna share how to copy a bootable Windows disk I mean how to back up a Windows CD/ DVD disk. Suppose you purchased a Windows from Microsoft costing $200 and it doesn't work anymore after installing Windows for few times. Is it fair? Not at all - let's punish Microsoft!!


Necessary Tools
  • Windows Installation CD/ DVD (Maybe Windows 8, 7 or XP)
  • Blank Recordable CD/ DVD as per your requirement (CD for Windows XP Only)
  • At least one DVD Writer (Or two if available)
  • Burning Software like Nero or Infra Recorder (I'm gonna use Infra)
  • And of course a PC user with sufficient operating knowledge! 

And you should know, if you simply copy a Windows disk and burn it to another blank disk, then you will get something on that disk. But it will not be usable. Even if you're able to start installing Windows from running condition, it will be stopped installing after reboot. That means your disk will not be bootable. And you will not be able to set up Windows from a non bootable disk. So you have to create a data disk which will be bootable. Hope you got my point. 


Here, for the purpose of this tutorial, I'm gonna use Windows 8 Pro and Infra Recorder as burning software. So I will use the word Windows 8 and Infra Recorder evrywhere. But it applies for other versions of Windows too. 

You can also use Nero. But always remember, whatever you do, you have to create a data disk.


Let's Start
  • Insert your Windows 8 Disk into the DVD Drive
  • Now run Infra Recorder (Please download if you don't have it. It's free)
  • Go to the Menu bar > Actions > Copy Disk > To a Disk Image . . . 

Copy Data Disk


Now you will get another window as below - 

Copy Image File


Preparing the ISO File

Now select your source file I mean the Windows 8 Disk location. Normally it detects your drive automatically. Now manually choose the destination of your Windows Image file (ISO file), name it as Windows 8.iso and hit OK. Now copying will be started. Wait for the task to be finished. It may take few minutes. After completing the task, Windows disk will be ejected automatically. And you will get an iso image of your Windows.


Now insert a blank DVD in the drive. The size of a single layer DVD is usually 4.7 GB. Try to use a good disk. Otherwise it will not be durable. 


Burning the Image to Blank DVD

Go to the Infra Recorder again and choose Burn Image from Actions menu. Locate Windows 8.iso from your hard disk and open it. Choose the drive which contains blank DVD and hit OK. And the burning process will be started immediately. 


You can also burn through Windows 8. No third party software is needed. If you have previously saved copy of a Windows iso image then you don't need Nero or Infra Recorder. Simply click right mouse button over the Windows.iso file and choose Burn Disk Image. Choose your DVD drive and start burning! 


Windows Built in Burner


Caution

  • Make sure that your master disk is okay and free of scratches. 
  • Use quality blank disk. 
  • Before inserting the disk to the drive, gently clean it with a soft tissue paper. 
  • Any interruption in the power supply during this operation is not acceptable. 

If you face any problem, please inform me. 


Stay with Marks PC Solution to get more interesting IT topics!


Thứ Sáu, 25 tháng 4, 2014

Bliss - World's Most Viewed Photo!

0 nhận xét

Bliss - The Most Viewed Photo of the World


Windows users are certianly familiar with the default wallpaper of Windows XP - Bliss. In fact, most of the people are familiar with the Bliss wallpaper even not being a computer user! Over the last decade it's been the most viewed as well as famous photo of the world. You should know Microsoft has stopped providing technical support for Windows XP from April 08, 2014. And now it's time to say Goodbye to this popular operating system. 


Microsoft purchased this photo from Charles O'Rear who is a former National Geographic photographer. Microsoft team visited his house before saying goodbye to Windows XP. You can watch the interview in YouTube


The Story Behind Bliss Wallpaper

Bliss is the default desktop wallpaper of Microsoft Windows XP. It is an image of a rolling green hill and a blue sky with clouds. Only few people can recognize this picture as natural. Most of us think that it's graphically manipulated. But the photographer said - it was not! Have a look - 


The Default Wallpaper of Microsoft Windows XP


This photo was taken by Charles O'Rear, former National Geographic photographer, a resident of Napa Valley, in January, 1998. O'Rear was on his way to meet his Girl Friend Daphne Irwin (who he later married). He saw the hill free of vineyears. The grass was perfect green. There was bright sunshine with clouds in the blue sky. 


Charles O'Rear


O'Rear stopped somewhere near the Napa-Sonoma county line and set his Mamiya RZ67 Medium-Format camera on a stand. He chose Fuji film for its excellent quality. He took four pictures and later one of these was licensed by Microsoft. 


Mamiya RZ67 Medium-Format Camera


Charles also said that many photographer took the picture of same area of California. But he was really lucky. Because the light was great. The sky was little bit cloudy and green. The hillside was covered by green grass. But normally there is only grapevines. 


Bliss Location on World Map

This map is showing the approximate location where the Bliss image area is located. The exact position is 38.2489660 North and 122.410269West. 


8 years later, on November 27, 2006, Goldin+Senneby visited the site in Sonoma Valley where the Bliss image was taken. The same location was completely different. That place was full of vines. Have a look . . . 

Bliss Location in November 2006


Stay with Marks PC Solution to get more interesting IT topics!